
Blueprint – 00. Administration

1 Introduction
In this Module, the user will learn how to set up:
- New Users / Edit Existing ones
- Create user roles and apply them to users
- Approval Workflows
- User Groups and Group Permissions
2 Users
2.1 User Creation
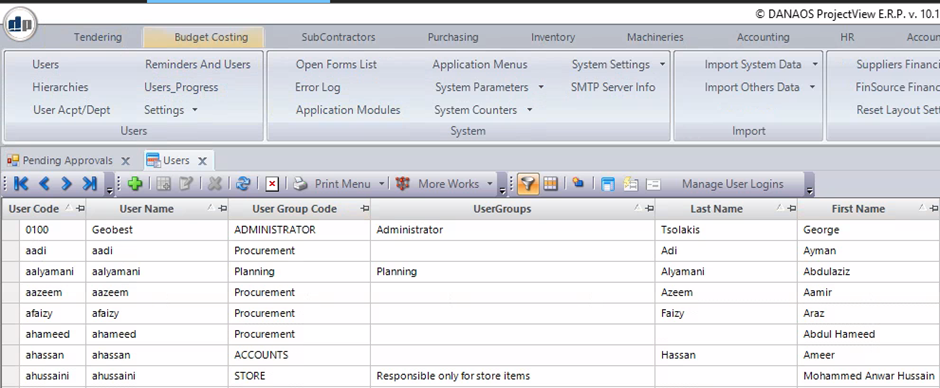
In order to create a new user, the admin should navigate to:
Administration > Users
Once in the Users page, the green plus button should be clicked to start the process:
Once clicked, the admin will be taken to the user creation screen below:
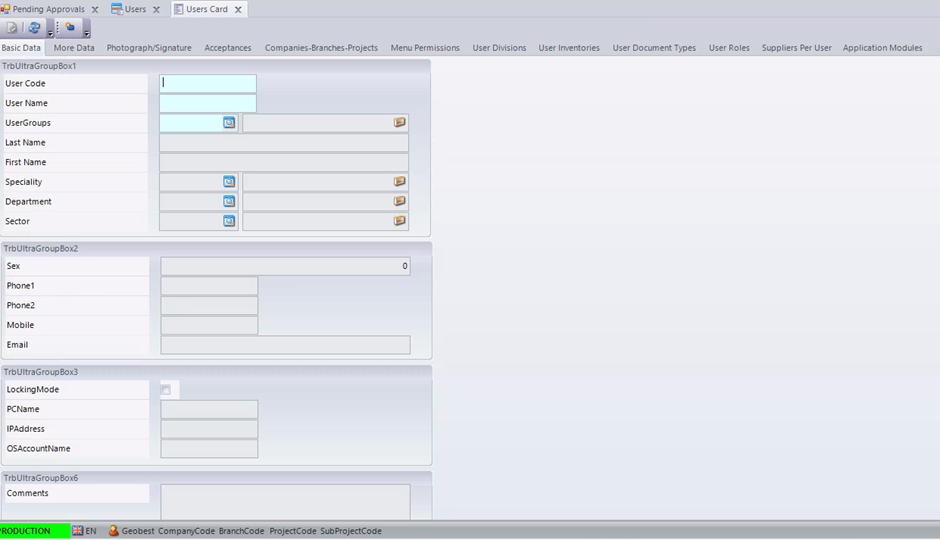
The only required fields in order to save/create the user are:
- User Code
- User Name
- User Groups, important for limiting access and permissions on ProjectView
During user creation, a few things that are not mandatory are important to add:
- User Role, to be used in approval matrices and other important modules
- User Password
- Email, in order to receive role related emails from ProjectView3
- Speciality (Job Title)
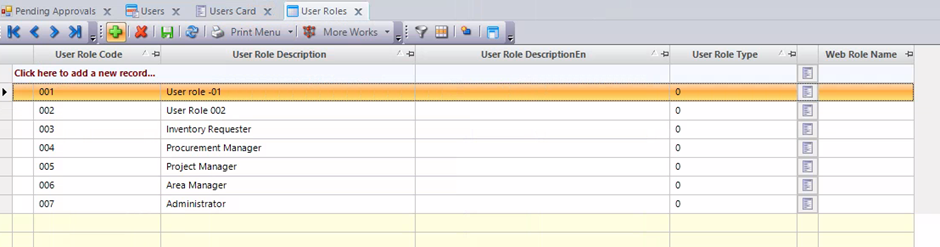
User Roles can be accessed on the “User Role” Tab:

More than one user role can be assigned to the same user.
Clicking on the blue button will present a drop-down list which contains all the created roles for the user to choose from.
3 Creating User Groups and Roles
3.1 Creating User roles
In order to create user roles, the user must navigate to:
Administration > Settings > User Roles

Once on the screen, the user is now able to create the suitable list for the company:
In order to add to the list, the user must simply type the role code and description in the empty top row after clicking the green plus.
Always save the screen when done, using the save button highlighted above.
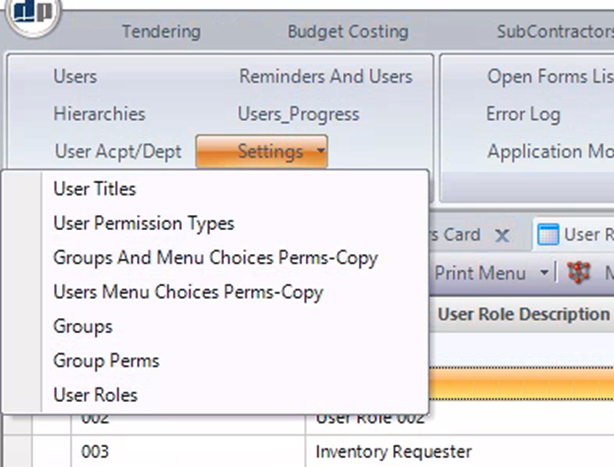
3.2 Creating User Groups
Similar to User Role creation, the admin must navigate to:
Administration > Settings > Groups

Once in the Groups screen, the user will then need to create the list similar to the User Roles:
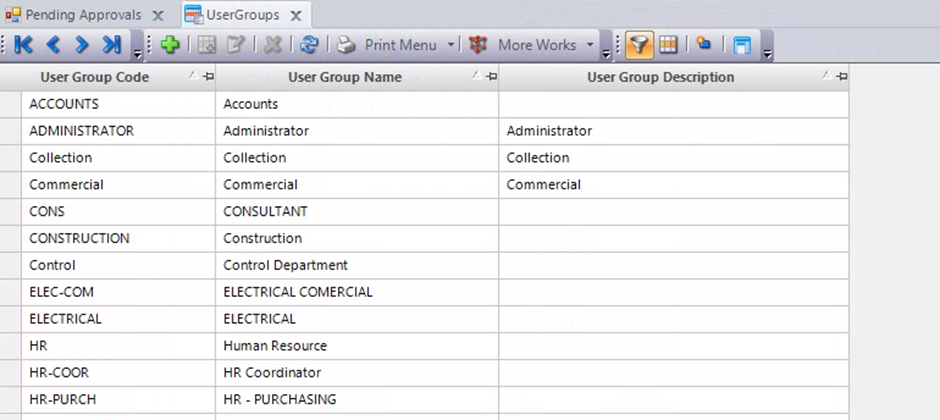
In order to add to the list, the user must simply type the Group code, Name and description in the empty top row after clicking the green plus.
Always save the screen when done, using the save button highlighted above.
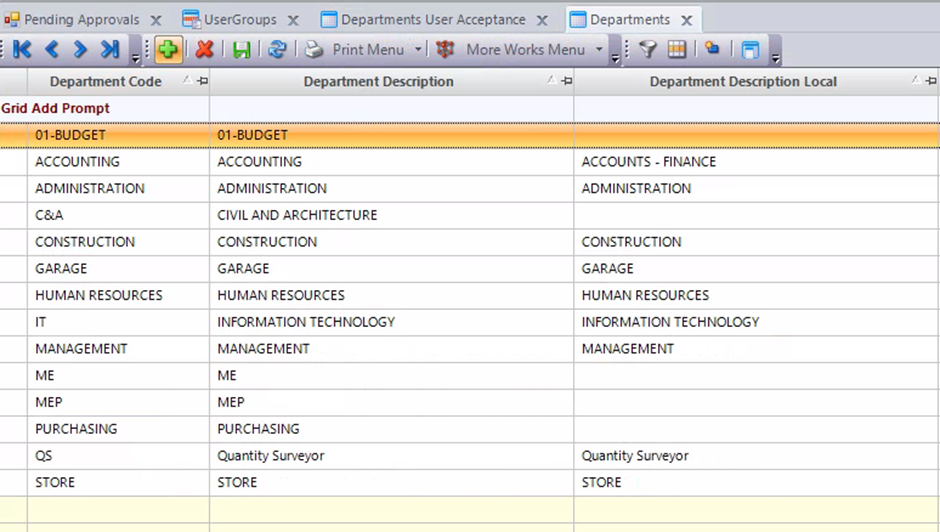
3.3 Creating User Departments
In order to create new departments, the user must navigate to:
Settings > General Settings > Other Settings > Departments

Similar to the other lists the department screen is as follows:
4 Approval Workflows
4.1 Creating the workflow
In order to access the user approval matrices, the user must navigate to;
Administration > User Acpt/Dept

Once on the screen, the user can retrieve to see the existing approvals:

To create a new approval matrix the user must enter the following:
- Cost Link Code, to assign to which screen/window the approval will be applied to
- The level No, the user must create the levels of approval line by line for the matrix
- The Department, this allows to have several approval matrices on the same cost link code by applying different departments on that screen.
- The User Role, User Code, or User Title, depending on which one is chosen the matrix will allocate the respective person to that level of approval
- In some screens, an Accounting Approval is required. A column named “AccountingApproval” in the approval screen is available to mark the level as an accounting approval level.
In all the columns mentioned above, exists a blue button to browse the list of available options.
5 Group Permissions
5.1 Assigning the group permissions
In order to Assign Group permissions, the user must navigate to:
Administration > Settings > Groups perms
Once on the Group Perms screen, the user will see the list of the groups on the left and the menus on the right. (Note: for the data to appear, the user must click on “Retrieve”):
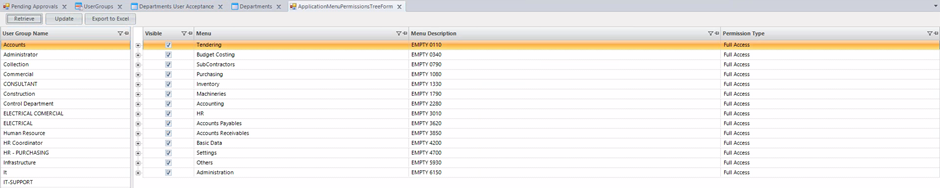
After the target Group has been chosen the user is then able to go through each of the menus available in the menu tree and select which ones will be visible or not the group by ticking the checkbox on the “Visible” Column:
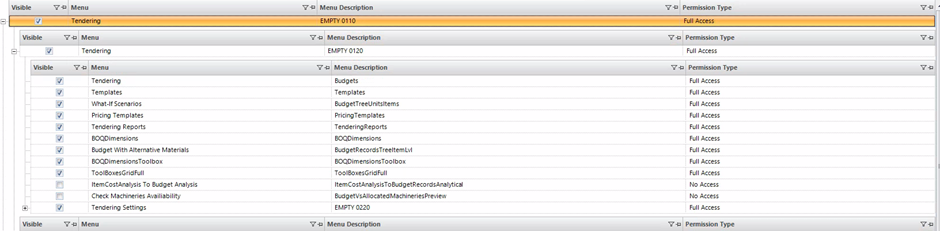
Further limitations can be set if it is visible, through three options:
- Full Access
- Read Only
- No Access
Full Access allows the user to use the selected screen/menu to its fullest functions
Read only allows the user to view the data and information stored in the screens/menus but not edit it.
No access completely blocks the user from accessing the screen/menu.

0 Comments