
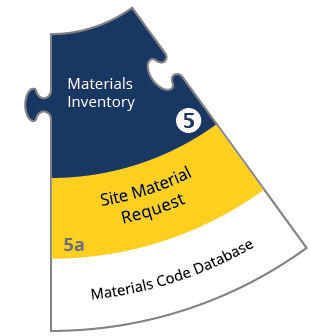
Blueprint – 05. Materials / Inventory
General Glossary
| No. | Term | Explanation |
| 1 | SIR | SITE ITEM REQUEST |
| 2 | MRF | MATERIAL REQUEST FORM |
| 3 | QTY | QUANTITY |
| 4 | INV | INVETORY |
1 Creation of Site Item Request from Site (based on Budget) & Creation of MRF/Internal Orders
Site engineers can create an SIR(Site Item Request) in order to request materials from the Budget based on the analysis of each BOQ line.
At this screen the Relevant project and a budget No need to be filled. The selected BOQ budget contains all the BOQ line resources that have been applied from the planners at the tendering phase.
At the detail line of the SIR the preferred BOQ item can be selected and by this selection the relevant materials from the BOQ Budget appear. This prevents the users from selecting materials that are not associated with the Budget when they are creating the SIR.
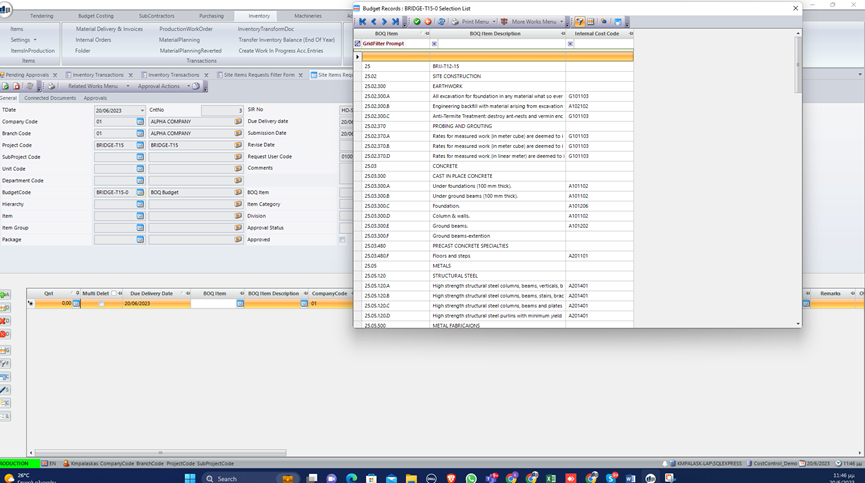
It has to be noted though that in case materials other than the ones that have already been associated with this BOQ Item are needed the system offers the option to do so. What needs to be done is to add a new detail line, filling the BOQ Item field with the BOQ Item and checking the field extra item. By doing so the whole list of materials becomes available to the user to select and add the desired Item.
It is obvious that this line comes empty and QTY needs to be filled keeping in mind that by adding something extra budget is being exceeded. After checking the field” approved” in the header the SIR gets saved and created.
2 Expedite Site Item Request (Create MRF or Internal Order)
The created transaction can then be seen by the appropriate person(could be Inventory or Project Manager) using the Menu selection SiteItems Request Tree.
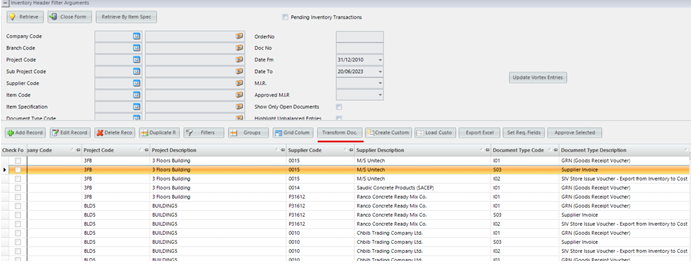
At the “SiteItems Request Tree” screen the relevant project needs to be filled and When clicking retrieve the items associated to the project appear on the detail line of this tree transaction.
By clicking on the left of each detail line we can have all information like QTY Ordered, SIR QTY Pending, Stock per Project QTY (in case this field has a value this value shows the QTY that is now available in stock for this Project), QTY that exists in other MRF(if there is any), Budget QTY etc.
In case users decide to proceed and create an MRF via this SIR they just need to click on the drop down list menu of “User Selection Group Code” field and select MRF.
They also need to check the “ MRF” named field placed on the lower left part of the Header. Then “Transfer” field need to be pressed. The system provides then a pop up field that is named “Optional MRF Comment” so that any relevant comment to this MRF can be added.
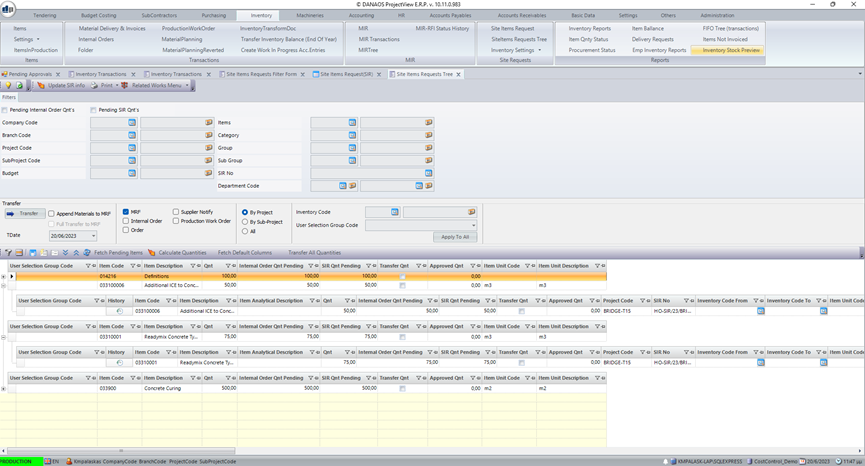
By selecting MRF from Purchasing menu and by narrowing the selection using the MRF’s date creation the created MRF appears. This MRF contains the materials and the QTYs entered in the SIR.
3 Import Materials from Order
When an order is received then the materials need to be imported into inventory.
As mentioned previously at the creation of a BOQ Budget each BOQ item is associated with certain items/materials that are needed for this specific BOQ.
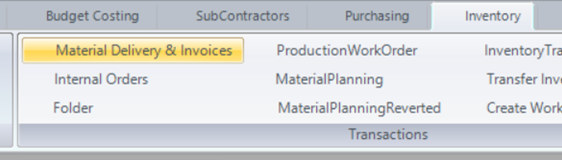
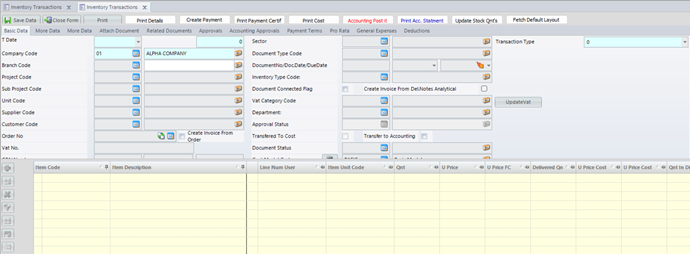
From the Requisition an order is created that needs to be imported into the Inventory. From Inventory module by selecting Materials Delivery and Invoices tab user can add a new record. After entering the (1)project and by clicking on (2) the orders drop down menu a pop up window containing all relevant orders appears.
The orders that are displayed in red color need to be approved first( from the orders screen).
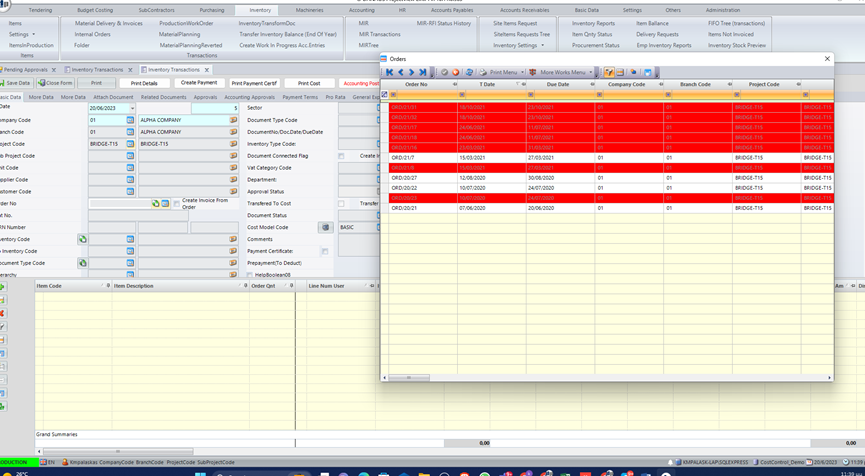
Users need to fill also (3) the Inventory field that the materials are going to be imported. By clicking on Inventory field all available Inventories appear for the user to select one. As available Inventories appear the ones that have been set in Inventory Settings menu option by selecting Inventories. At this screen Inventories can be associated with Company/Branch/Project. If left blank and no association is made then these Inventories are available to all Companies/Branches/Projects.
Now at the (4) Document type field code must be filled with the value “01” and also the (5) Inventory Type Field must be filled with the value “GRN”(Good Received Note). The (6) Document Number and (7) Department need to be also filled. After saving at the comments section the Doc Number along with the Order Number and GRN number are displayed.
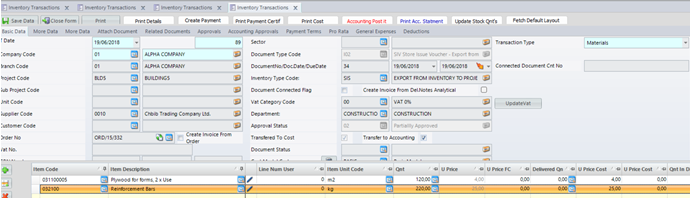
In order for the items to be imported the button next to the order needs to be pressed. Then at the detail line all materials associated with this order appear.
At the detail line two quantity fields appear. One of the is the Order QTY and the Other QTY field can be used to enter the exact quantity users wish to import.
4 Export Materials from Inventory to Cost
In order to export the materials the same screen Materials Delivery and Invoices should be selected.
Add a new transaction
A new transaction should be created from the following screen.
The project should be filled and also Inventory.
Users should select here the Inventory they want to export materials from. The document Type field should be filled with “I02” value. (Export from Inventory to Cost). The document number has to be filled as well as the department field. The transaction needs to be saved and then by pressing the tabthat is on the left side of the Inventory Field all Inventory Items appear on a pop up window. These Items belong to different Projects.
At this point users can select the Items that they need to export and also define the quantities that they want to Export. At the detail line the cost code associated to these Items need to be entered At the field Cost Description. From the pop up window that appears the last level has to be selected and then the correct cost code. This has to be done for all items.
Items can be exported to the same or different cost codes.
This export updates the budget versus cost screen also.
5 Creation of Supplier Invoice
From the Inventory transactions screen the Document Type I01 should be selected.
Then by pressing the tab Transform Doc the system creates the type S03 Supplier
Invoice Doc Type Code and the Inventory Type Code needs to be INV( Supplier Invoice). The field transfer to Accounting needs to be checked also.(If needed) The department needs to be selected and a document number has to be entered. By pressing the tab Print Accounting Statement the system displays the created entry showing the Correct Accounting codes and the credit/debit Amounts. The correct set ups have to be done prior to this(Supplier Accounting codes, Inventories, Materials),Finally this transaction can be posted from the person that is authorized to do so using the tab Accounting Post it.
Key Features and Functionalities Presented
| No. | Features and Functionalities | Yes/No |
| 1 | Creation of Site Item Request from Site (Based on Budget) | |
| 2 | Expedite Site Item Request (Create MRF or Internal Order) | |
| 3 | Import materials from order | |
| 4 | Export Materials from Inventory to Cost | |
| 6 | Creation of Supplier Invoice |

0 Comments